Do you love playing MagiQuest at Great Wolf Lodge at Grand Mound, WA, but need some help getting through all of the quests and adventures? Look no further! I have a MagiQuest Cheat Sheet for you that will help with every quest and adventure along the way.
Our kids love playing Great Wolf Lodge MagiQuest in Grand Mound, WA. They have mastered all of the quests and were even rewarded with a Master Magi pin to take home.
It is a great interactive game to explore while enjoying your time at Great Wolf Lodge.

What is Great Wolf Lodge MagiQuest?
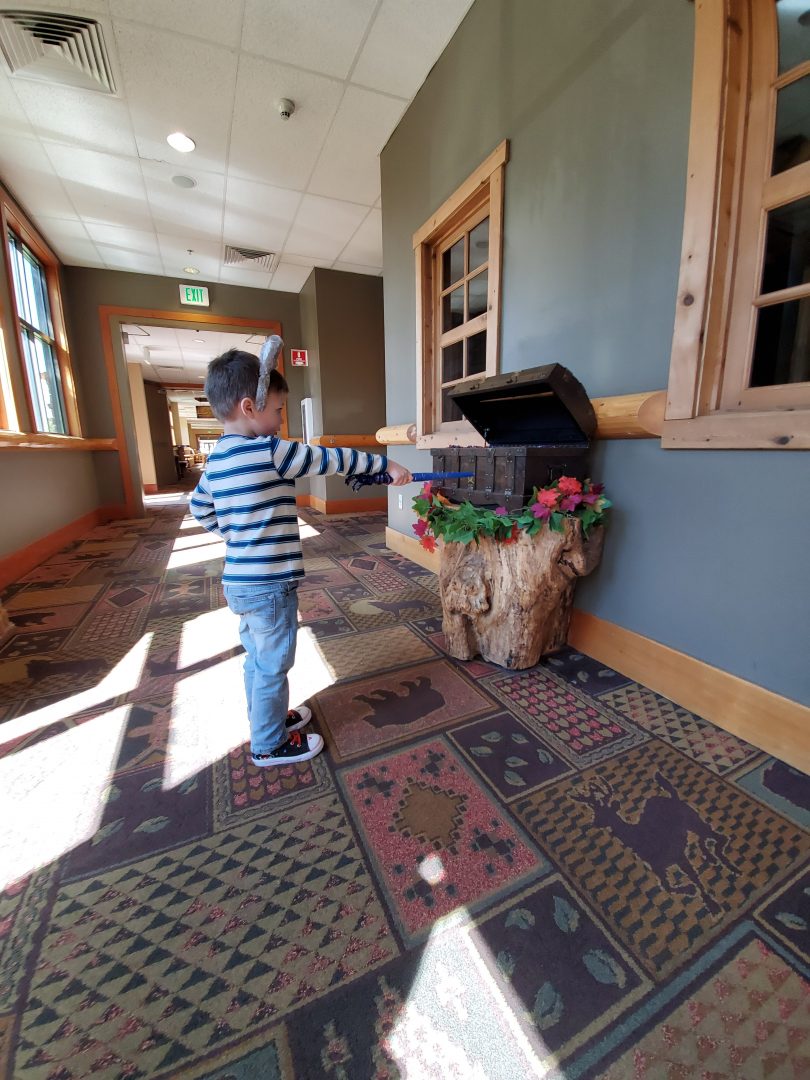
If you are unfamiliar with MagiQuest at Great Wolf Lodge, it is an interactive game that involves a scavenger hunt of quests and adventures. Great Wolf Lodge is literally your playground where clues from the MagiQuest booklet you receive.
Wands for the game are available for purchase with a special magic wand top also available for a separate price that adds extra powers to your wand.
You can take your wands home as a souvenir and bring them back to Great Wolf Lodge to be reactivated at the MagiQuest store to continue where you left off in your previous quest or adventure. There is no need to start all over.
What wand toppers are best for MagiQuest play?
Be sure to ask your MagiQuest guides at the store location for tips and best toppers for your quests. There might be new toppers available from those listed below.
- THE LEARNED OWL
With this power, you can summon the knower of secrets in the Kingdom, the Learned Owl. He will give you hints on your journeys. - UNICORN’S POWER OF MUSIC
With the power of the Unicorn, an abundance of Gold and good cheer will be spread to all those in the Kingdom. - SUMMON XAVIER
With the power of the blue claw, one can summon the villain Xavier to the Kingdom. Xavier will make his presence known by his laughter ringing throughout the Kingdom and stop everyone in their tracks. - POWER OF LAUGHTER
With the power of Laughter granted by the Trixter’s Emblem, you can bring a smile to the Kingdom. - MASTER HEALING
With the power of healing, you can instantly heal the Pixie’s green crystal. Also, this powerful spell will save you once in a duel against Charlock, giving you one more chance to beat him. - FIREBURST
With the power of the Fireburst, you can instantly defeat the Silver Dragon.

How long does it take to complete MagiQuest?
MagiQuest can take a few hours to get through all of the quests and adventures. We played for nearly 4 straight hours to get through every single quest and we still have some adventures to complete. However, you will be having so much fun getting through everything that you don’t even realize just how long you have been playing.
The best part is too when you stay at Great Wolf Lodge, your wand is activated through your stay. Also, as I mentioned above, you can bring your wand back to reactivate at any time. You can easily take a break or spend time each day of your stay completing quests.
MagiQuest Tips: Use the stairs when exploring the quests and adventures. It might be tempting to use the elevators when there are so many floors to explore but you will find a lot of clues and quests to complete within the stairwells.
Great Wolf Lodge MagiQuest Cheat Sheet for Grand Mound, WA
Here is why you probably came here. Below you will find a cheat sheet for all of the quests and adventures. These are subject to change but if you are staying at Great Wolf Lodge, Grand Mound, WA, this cheat sheet is for you.
Try to do these steps in order for each quest as some require you to do them in order. You will also need to return to the trees outside of the arcade in Pixie’s Hall to assign a new quest once completing all of the tasks in each quest.
Dazzle Quest
- Red Crystal, 2nd floor by the arcade (Pixie’s Hall)
- Blue Crystal, 2nd floor by the arcade (Pixie’s Hall)
- Yellow Crystal, 1st floor down the hallways headed towards Wood Fire Grill (Forgotten Hall)
- Purple Crystal, 1st floor down the hallways headed towards Wood Fire Grill (Forgotten Hall)
- White Crystal, 2nd floor stairwell across from the elevators (Enchanted Woods)
- Lady in the Leaves, 1st floor down the hallways headed towards Wood Fire Grill (Forgotten Hall)
Enchant Quest
- Paw Treasure Chest, 2nd floor at the top of the lobby stairs (Pixie’s Hall)
- Paw Treasure Chest, 2nd floor right outside of the doors to the arcade (Pixie’s Hall)
- Paw Treasure Chest, 1st floor down the hallways headed towards Wood Fire Grill (Forgotten Hall)
- Eagle Painting, 1st floor down the hallways headed towards Wood Fire Grill (Forgotten Hall)
- Pixie Crystal, 2nd floor past the elevators towards the rooms – in a room labeled Pixie’s Perch, activate the crystal on the left-hand side of the door – when it turns green, then activate the crystal at the front
Healing Quest
- Forest Fern, 2nd floor by the arcade (Pixie’s Hall)
- Shadow Moss, 2nd floor by Pixie’s Perch (Pixie’s Hall)
- Tree Slime, 3rd floor stairwell (Enchanted Woods/Whispering Woods)
- Knot Hole Fungus, 3rd floor outside of elevators (Whispering Woods)
- Princess Crystal, 2nd floor in Pixie’s Perch – activate crystal on the left side in front of the fence until it turns green
- Princess Potion, 2nd floor in Pixie’s Perch – after activating crystal from the above task, activate the blue potion bottle to the left
Portal Quest
- Accumulate 2000 gold from each chest. Each chest can be hit up to three times each around the lodge.
- Lady in the Wall, 2nd floor outside of the arcade between the two trees (Pixie’s Hall)
Freeze Quest
- Lantern, 3rd floor in stairwell (Enchanted Hall/Whispering Woods)
- Tree Painting, 3rd floor by the elevators (Whispering Woods)
- Freezing Book, 4th floor by the elevators (Piney Path)
- Fairy Painting, 4th floor near the elevators (Piney Path)
- Man in the Stump, 3rd floor by the elevators (Whispering Woods)
Ice Arrow Quest
- Icicles, 4th floor stairwell (Enchanted Stairway/Piney Path)
- Snowflake, 3rd floor by the elevators (Whispering Woods)
- Dragon Scales, 5th floor by the elevators (Tangled Woods)
- Hawk’s Claw, 4th floor by the elevators (Piney Path)
- Owl Station, 5th floor by the elevators (Tangled Woods)
Protection Quest
- Accumulate 2000 gold from each chest. Each chest can be hit up to three times each around the lodge.
- Hourglass, 5th floor stairwell (Tangled Woods) – once you activate, you have thirty seconds to complete the next task
- Crown Chest, 4th floor near the elevators (Piney Path)
- Tree Man, 4th floor near the elevators (Piney Path)
Celestial Quest
- Telescope, 1st floor in the main lobby above the front doors (Forgotten Hall)
- Sun, 4th floor across from the elevators (Piney Path)
- Moon, 3rd floor across from the elevators (Whispering Woods)
- Star Painting, 5th floor near the elevators (Tangled Woods)
- Book of Constellations, 4th floor stairwell (Enchanted Woods/Pine Path)
- Armillary Stargazer, 2nd floor outside of the arcade – look for painting on the wall (Pixie’s Hall)
Great Wolf Quest
This quest requires you to return to the Star Map that is outside of the arcade. It is the TV screen to the right if you are looking into the arcade. After you complete each task, return to the Star Map before proceeding to the next.
- Wolf in Stars, 1st floor in the main lobby by the stairs (Forgotten Hall)
- Return to Star Map
- Eyes of the Wolf, 2nd floor across from the main fireplace – look for the statue (Forgotten Hall)
- Return to Star Map
- Wolf in Chest, 1st floor down the hallways headed towards Wood Fire Grill (Forgotten Hall)
- Return to Star Map
- Eyes on the Wolf, 2nd floor across from the elevators (Pixie’s Hall)
- Return to Star Map
- Courage Stone, 2nd floor outside of the arcaded across from the trees (Pixie’s Hall)
Master Magi Quest
- First Star, 1st floor on the ceiling down the hall towards the Wood Fire Grill (Forgotten Hall)
- Second Star, 2nd floor on the ceiling towards Pixie’s Perch (Pixie’s Hall)
- Third Star, 3rd floor on ceiling towards rooms (Whispering Woods)
- Fourth Star, 4th floor on ceiling towards rooms (Piney Path)
- Fifth Star, 5th floor on ceiling towards rooms (Tangled Woods)
- Book of Stars, 5th floor by the elevators (Tangled Woods)
- Creativity Stone, 5th floor by the elevators (Tangled Woods)
- Communication Stone, 4th floor by the elevators (Piney Path)
- Collaboration Stone, 3rd floor by the elevators (Whispering Woods)
- Courage Stone, 2nd floor outside of arcade (Pixie’s Hall)
- Master Magi Chest, 2nd floor at the top of the lobby stairs on the right-hand side (Pixie’s Hall)
Red Dragon Adventure
You must possess Protection, Freeze, Portal, and Ice Arrow Runes to defeat the Red Dragon.
- Dragon Painting, 5th floor (Tangled Woods)
- Dragon Crystal, outside of the Dragon’s Lair
- You must light up the symbols on the outside of the Red Dragon’s Lair in the right order – light up symbols from top left, top right, to the bottom left – light up the portal symbol on the left side of the archway, inside of the lair – light up the MQ symbol on the Dragon Portal
- Charlock will make a speech, and the battle begins
- First, select the Protection Rune on the portal screen and then wave your want at Charloc in or order to protect from his fire
- After Charlock breaths fire, select the Freeze Rune. Wait until he turns around and shows you his weak spot (a tiny red circle on his side) and then cast at him. If done correctly, Charlock will turn blue and freeze. If not, he will breathe fire again and you will take damage.
- Once Charlock is frozen, select the Ice Arrow Rune and cast on Charlock. If done correctly, an ice arrow will fire at Charlock and he will take damage. If not, Charlock will break free from the ice and you will take damage.
- Complete this sequence correctly three times to defeat Charlock.
- Turn behind you to claim the treasure.
Ursa Major Adventure
You must possess Celestial and Great Wolf Runes.
- Wolf and Eagle Painting, 5th floor stairwell (Tangled Woods)
- Red Shouldered Hawk Portrait, 2nd floor stairwell (Pixie’s Hall)
- Amulet Chest, 2nd floor outside of Glow Golf – must cast three times until you get the amulet (Pixie’s Hall)
- Ruby, 2nd floor between the photo booth and the tree (Pixie’s Hall)
- Emerald, 3rd floor near the elevators (Whispering Woods)
- Sapphire, 2nd floor across from the elevators (Pixie’s Hall)
- Topaz, 4th floor near the elevators (Piney Path)
- Diamond, 5th floor near the elevators (Tangled Woods)
- Pixies Crystal, 2nd floor inside of Pixie’s Perch – crystal on the left (Pixie’s Hall)
- Ursa Major Amulet, 2nd floor inside of Pixie’s Perch – box off to the right side (Pixie’s Hall)
- Ursa Major will appear and ask you for the five stones – keep casting at Ursa Major until you have given him all five stones
Quick Tip: These gems are in the frames and not the crystal gems on the stands throughout the quests. They will be on the walls.
Pixie Adventure
You must possess Enchant, Heal, and Dazzle Runes.
- Smudgy (caged otter), 1st floor on the main lobby stairs (Forgotten Hall)
- Birdhouse, 2nd floor right outside of the arcade (Pixie’s Hall)
- Red Chest, 3rd floor near the elevator (Whispering Woods)
- Pixie Crystal, inside of Pixie’s Perch on the left-hand side (Pixie’s Hall)
- Pixie Encounter, cast at the crystal in front of the TV screen, then point at the screen and keep the leaves lit until the crystal is completely healed
Silver Dragon Adventure
You must have completed the Red Dragon Adventure.
- Dragon Crystal, 2nd floor outside of the elevators (Pixie’s Hall)
- Silver Dragon will appear – obtain the crystal shield (optional)
- Select “Obtain the Crystal Shield”
- Go to the trees where the status stations are for a riddle – complete one at a time, 5 in total
- Each riddle will make a reference to one of the 5 crystals from the Dazzle Rune Quest (red, blue, yellow, purple, and white) – collect the appropriate crystal based on the given riddle
- Once collected, return to the Dragon’s Lair
- Next, you will battle the Silver Dragon
- Select “Battle the Silver Dragon”
- Silver Dragon will light up 3 crystals in a random order
- Touch those same 3 crystals on the screen in the same order and then touch the rune – shake your want at the TV
- Silver Dragon will take damage if done correctly
- Silver Dragon will then do sequences of 5, then 7, then 8 – each time gets faster
- Repeat the order for each one, followed by the rune, then shake your want at the TV
Be sure to book your next Great Wolf Lodge vacation by visiting online. I highly recommend purchasing one of the select Paw Passes to enjoy all of the great activities (including MagiQuest) at Great Wolf Lodge.

More Great Wolf Lodge Tips:
- Great Wolf Lodge Summer Camp-In
- Great Wolf Lodge Grand Mound Opens Build-A-Bear Workshop®
- Spring-A-Palooza at Great Wolf Lodge
Great Wolf Lodge MagiQuest Cheat Sheet for Grand Mound, WA
Grab these tips to help you through the MagiQuest Game at Great Wolf Lodge in Grand Mound, Washington.
Try to do these steps in order for each quest as some require you to do them in order. You will also need to return to the trees outside of the arcade in Pixie's Hall to assign a new quest once completing all of the tasks in each quest.
Red Crystal, 2nd floor by the arcade (Pixie's Hall)
Blue Crystal, 2nd floor by the arcade (Pixie's Hall)
Yellow Crystal, 1st floor down the hallways headed towards Wood Fire Grill (Forgotten Hall)
Purple Crystal, 1st floor down the hallways headed towards Wood Fire Grill (Forgotten Hall)
White Crystal, 2nd floor stairwell across from the elevators (Enchanted Woods)
Lady in the Leaves, 1st floor down the hallways headed towards Wood Fire Grill (Forgotten Hall)
Enchant QuestPaw Treasure Chest, 2nd floor at the top of the lobby stairs (Pixie's Hall)
Paw Treasure Chest, 2nd floor right outside of the doors to the arcade (Pixie's Hall)
Paw Treasure Chest, 1st floor down the hallways headed towards Wood Fire Grill (Forgotten Hall)
Eagle Painting, 1st floor down the hallways headed towards Wood Fire Grill (Forgotten Hall)
Pixie Crystal, 2nd floor past the elevators towards the rooms - in a room labeled Pixie's Perch, activate the crystal on the left-hand side of the door - when it turns green, then activate the crystal at the front
Healing QuestForest Fern, 2nd floor by the arcade (Pixie's Hall)
Shadow Moss, 2nd floor by Pixie's Perch (Pixie's Hall)
Tree Slime, 3rd floor stairwell (Enchanted Woods/Whispering Woods)
Knot Hole Fungus, 3rd floor outside of elevators (Whispering Woods)
Princess Crystal, 2nd floor in Pixie's Perch - activate crystal on the left side in front of the fence until it turns green
Princess Potion, 2nd floor in Pixie's Perch - after activating crystal from the above task, activate the blue potion bottle to the left
Portal QuestAccumulate 2000 gold from each chest. Each chest can be hit up to three times each around the lodge.
Lady in the Wall, 2nd floor outside of the arcade between the two trees (Pixie's Hall)
Freeze QuestLantern, 3rd floor in stairwell (Enchanted Hall/Whispering Woods)
Tree Painting, 3rd floor by the elevators (Whispering Woods)
Freezing Book, 4th floor by the elevators (Piney Path)
Fairy Painting, 4th floor near the elevators (Piney Path)
Man in the Stump, 3rd floor by the elevators (Whispering Woods)
Ice Arrow QuestIcicles, 4th floor stairwell (Enchanted Stairway/Piney Path)
Snowflake, 3rd floor by the elevators (Whispering Woods)
Dragon Scales, 5th floor by the elevators (Tangled Woods)
Hawk's Claw, 4th floor by the elevators (Piney Path)
Owl Station, 5th floor by the elevators (Tangled Woods)
Protection QuestAccumulate 2000 gold from each chest. Each chest can be hit up to three times each around the lodge.
Hourglass, 5th floor stairwell (Tangled Woods) - once you activate, you have thirty seconds to complete the next task
Crown Chest, 4th floor near the elevators (Piney Path)
Tree Man, 4th floor near the elevators (Piney Path)
Celestial QuestTelescope, 1st floor in the main lobby above the front doors (Forgotten Hall)
Sun, 4th floor across from the elevators (Piney Path)
Moon, 3rd floor across from the elevators (Whispering Woods)
Star Painting, 5th floor near the elevators (Tangled Woods)
Book of Constellations, 4th floor stairwell (Enchanted Woods/Pine Path)
Armillary Stargazer, 2nd floor outside of the arcade - look for painting on the wall (Pixie's Hall)
Great Wolf QuestThis quest requires you to return to the Star Map that is outside of the arcade. It is the TV screen to the right if you are looking into the arcade. After you complete each task, return to the Star Map before proceeding to the next.
Wolf in Stars, 1st floor in the main lobby by the stairs (Forgotten Hall)
Return to Star Map
Eyes of the Wolf, 2nd floor across from the main fireplace - look for the statue (Forgotten Hall)
Return to Star Map
Wolf in Chest, 1st floor down the hallways headed towards Wood Fire Grill (Forgotten Hall)
Return to Star Map
Eyes on the Wolf, 2nd floor across from the elevators (Pixie's Hall)
Return to Star Map
Courage Stone, 2nd floor outside of the arcaded across from the trees (Pixie's Hall)
Master Magi QuestFirst Star, 1st floor on the ceiling down the hall towards the Wood Fire Grill (Forgotten Hall)
Second Star, 2nd floor on the ceiling towards Pixie's Perch (Pixie's Hall)
Third Star, 3rd floor on ceiling towards rooms (Whispering Woods)
Fourth Star, 4th floor on ceiling towards rooms (Piney Path)
Fifth Star, 5th floor on ceiling towards rooms (Tangled Woods)
Book of Stars, 5th floor by the elevators (Tangled Woods)
Creativity Stone, 5th floor by the elevators (Tangled Woods)
Communication Stone, 4th floor by the elevators (Piney Path)
Collaboration Stone, 3rd floor by the elevators (Whispering Woods)
Courage Stone, 2nd floor outside of arcade (Pixie's Hall)
Master Magi Chest, 2nd floor at the top of the lobby stairs on the right-hand side (Pixie's Hall)
Red Dragon AdventureYou must possess Protection, Freeze, Portal, and Ice Arrow Runes to defeat the Red Dragon.
Dragon Painting, 5th floor (Tangled Woods)
Dragon Crystal, outside of the Dragon's Lair
You must light up the symbols on the outside of the Red Dragon's Lair in the right order - light up symbols from top left, top right, to the bottom left - light up the portal symbol on the left side of the archway, inside of the lair - light up the MQ symbol on the Dragon Portal
Charlock will make a speech, and the battle begins
First, select the Protection Rune on the portal screen and then wave your want at Charloc in or order to protect from his fire
After Charlock breaths fire, select the Freeze Rune. Wait until he turns around and shows you his weak spot (a tiny red circle on his side) and then cast at him. If done correctly, Charlock will turn blue and freeze. If not, he will breathe fire again and you will take damage.
Once Charlock is frozen, select the Ice Arrow Rune and cast on Charlock. If done correctly, an ice arrow will fire at Charlock and he will take damage. If not, Charlock will break free from the ice and you will take damage.
Complete this sequence correctly three times to defeat Charlock.
Turn behind you to claim the treasure.
Ursa Major AdventureYou must possess Celestial and Great Wolf Runes.
Wolf and Eagle Painting, 5th floor stairwell (Tangled Woods)
Red Shouldered Hawk Portrait, 2nd floor stairwell (Pixie's Hall)
Amulet Chest, 2nd floor outside of Glow Golf - must cast three times until you get the amulet (Pixie's Hall)
Ruby, 2nd floor between the photo booth and the tree (Pixie's Hall)
Emerald, 3rd floor near the elevators (Whispering Woods)
Sapphire, 2nd floor across from the elevators (Pixie's Hall)
Topaz, 4th floor near the elevators (Piney Path)
Diamond, 5th floor near the elevators (Tangled Woods)
Pixies Crystal, 2nd floor inside of Pixie's Perch - crystal on the left (Pixie's Hall)
Ursa Major Amulet, 2nd floor inside of Pixie's Perch - box off to the right side (Pixie's Hall)
Ursa Major will appear and ask you for the five stones - keep casting at Ursa Major until you have given him all five stones
Quick Tip: These gems are in the frames and not the crystal gems on the stands throughout the quests. They will be on the walls.
Pixie AdventureYou must possess Enchant, Heal, and Dazzle Runes.
Smudgy (caged otter), 1st floor on the main lobby stairs (Forgotten Hall)
Birdhouse, 2nd floor right outside of the arcade (Pixie's Hall)
Red Chest, 3rd floor near the elevator (Whispering Woods)
Pixie Crystal, inside of Pixie's Perch on the left-hand side (Pixie's Hall)
Pixie Encounter, cast at the crystal in front of the TV screen, then point at the screen and keep the leaves lit until the crystal is completely healed
Silver Dragon AdventureYou must have completed the Red Dragon Adventure.
Dragon Crystal, 2nd floor outside of the elevators (Pixie's Hall)
Silver Dragon will appear - obtain the crystal shield (optional)
Select "Obtain the Crystal Shield"
Go to the trees where the status stations are for a riddle - complete one at a time, 5 in total
Each riddle will make a reference to one of the 5 crystals from the Dazzle Rune Quest (red, blue, yellow, purple, and white) - collect the appropriate crystal based on the given riddle
Once collected, return to the Dragon's Lair
Next, you will battle the Silver Dragon
Select "Battle the Silver Dragon"
Silver Dragon will light up 3 crystals in a random order
Touch those same 3 crystals on the screen in the same order and then touch the rune - shake your want at the TV
Silver Dragon will take damage if done correctly
Silver Dragon will then do sequences of 5, then 7, then 8 - each time gets faster
Repeat the order for each one, followed by the rune, then shake your want at the TV
Leave a Reply